UPDATE:
Find the tutorial on how to make an Ice Cream Cake with surprise inside polka dots as seen on KUTV Channel 2 here.
Will putting polka dots inside a cake work? How does one do that? I conducted a little experiment to find out.
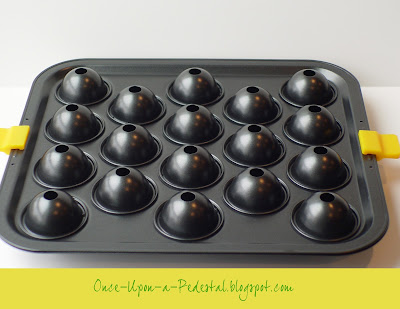
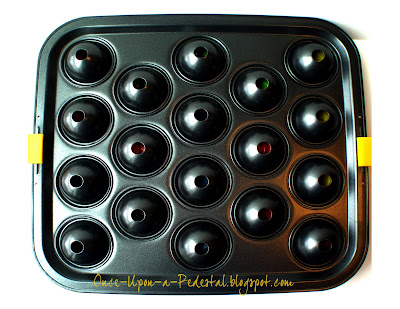
Perhaps you've seen these in the store lately and walked right by them. Like I did. Countless times.
I kept asking myself, "Why in the world would I possibly need that when I can roll a perfectly round cake ball with my own two hands?" And then one night I had this great idea for an experiment. (I always call them great ideas until they fail miserably.) How about using them to put polka dots inside a cake? Rather large polka dots. But polka dots all the same.
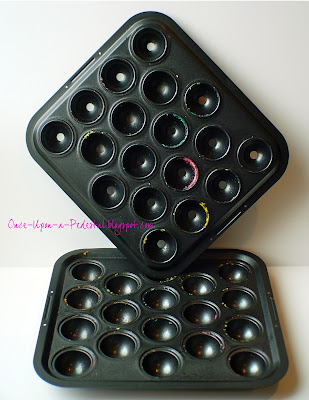
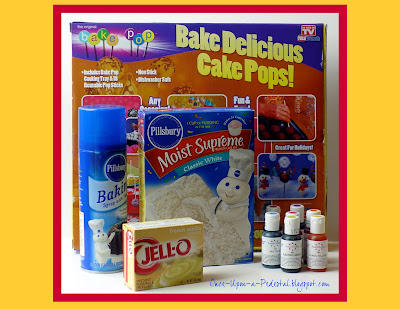
After researching cake ball pans a bit, I settled on this brand. Mostly because makes 18 balls at once and my coupons at Bed Bath and Beyond were begging to be used. With tax and coupon, final cost was just over $16.
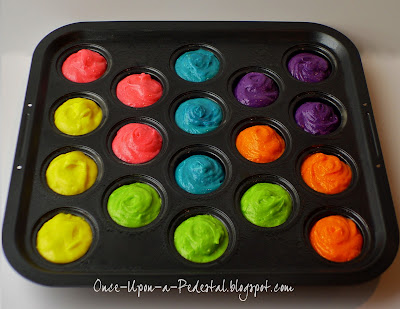
I started with a white cake mix and made some of the adjustments recommended in the instruction guide that came with the bake pop pan. After dividing the batter in half, I further divided half of the batter evenly between 6 bowls for tinting. The colors I used were AmeriColor soft gel pastes in 113 orange, 107 lemon yellow, 164 electric pink, 162 electric green, 103 sky blue, and a mix of 130 regal purple/165 electric purple. I used about 1/2 t. of each so that the colors would remain vivid after baking.
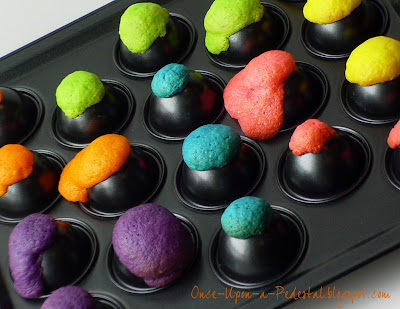
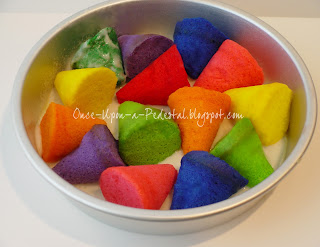
You can see the bright colors in the vents peeking through after the clamps were put on. The instruction guide suggests baking at 350F for 25-30 minutes but that sounded WAY too long. My goal was to slightly under bake them so that they wouldn't dry out too much during the second bake time. They were done at 13 minutes in my oven.
The instruction guide also suggests spraying some non-stick baking spray with flour on the outside of the vents. I failed to take their advice. I was sure that only filling them to the rim wouldn't cause eruptions. But I was WRONG. Mini volcanoes!
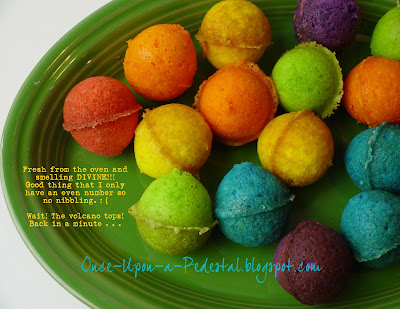
One of the happiest surprises of the day was that the volcanoes were more like little caps that popped off almost by themselves leaving the insides intact.
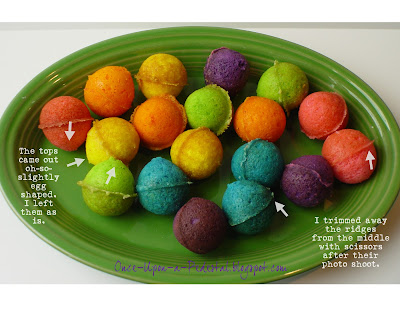
The mess on the outside was minimal after removing the tops with no damage to the balls.
The pans are non-stick but do require a baking spray with flour to help the balls bake evenly. Clean up was fairly easy.
After some quality control and taste testing of the volcanoes, the experiment resumed.
I also ended up trimming the tiniest bit off the tops to make them rounder.
We'll see if that mattered later on.
We'll see if that mattered later on.
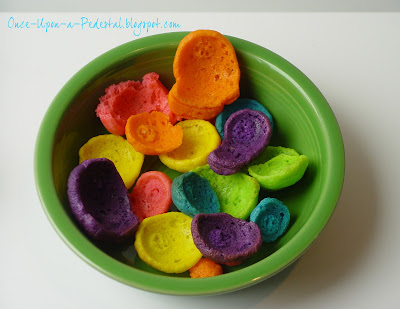
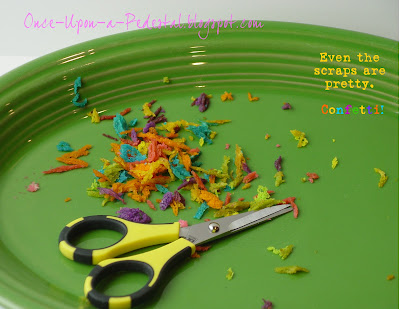
The scraps.
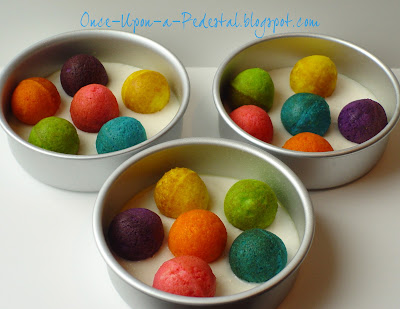
After adding just enough batter to cover the bottom of my prepared pans, the cake balls were placed inside. My original plan was to freeze the balls before this step but I skipped it so they were room temp when they went in the pans.
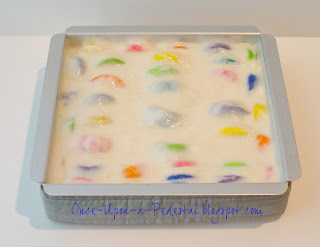
The remaining batter was scooped over each ball to cover. And into the oven they went. Looking rather more like dinner rolls than cake. I didn't tap the pans or even the batter out for fear of uncovering the balls.
I ended up using 2 white cake mixes for 3 six-inch rounds. Long story. After trying to capture the steps on the camera, the half batch of batter that I'd hoped to use to cover the balls was getting weird. It had just set out too long. I baked it up in a small oval pan as a decoy for my husband to keep him away from the real project. Never a task for the faint of heart.
For the cake balls, I used the cake mix and pudding along with the substitution of milk for the water per the instruction guide. I did not decrease the liquid as suggested or increase the eggs but went instead with the amounts on the cake mix box.
Since I'd used whole eggs for the cake balls, the remaining half batch of batter had a yellow tinge. And there wasn't enough of it to cover the balls. Yet another reason to use a second cake mix.
The second mix was mixed using the egg white method and ingredients listed on the box except for about a teaspoon of almond extract. Force of habit. So I had a nice white batter to contrast with the bright colors.
The filled six-inch rounds baked about 30 to 35 minutes or until they pulled from the sides of the pan and sprang back when touched lightly. I didn't use the toothpick method for fear of stabbing a colored ball or hopefully soon-to-be-polka-dot since the balls were already cooked and not a true gauge of doneness.
Waiting for them to cool and frost was like waiting for my water to break with my first born. Okay. Maybe not quite that dramatic. But the anticipation was palpable in my kitchen. I know, I know. Get a life.
You can see some of the color coming through in spots. Never wanted to take a knife to a cake more badly in my life. But I waited.
Off to the freezer to chill out and wait until the next day for a crumb coat and slathering of white frosting.
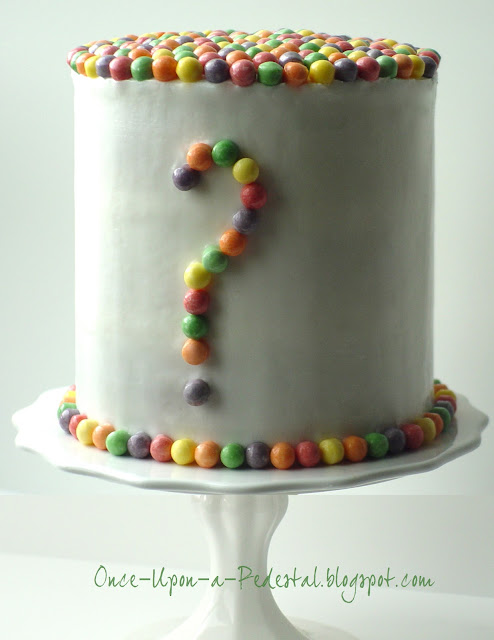
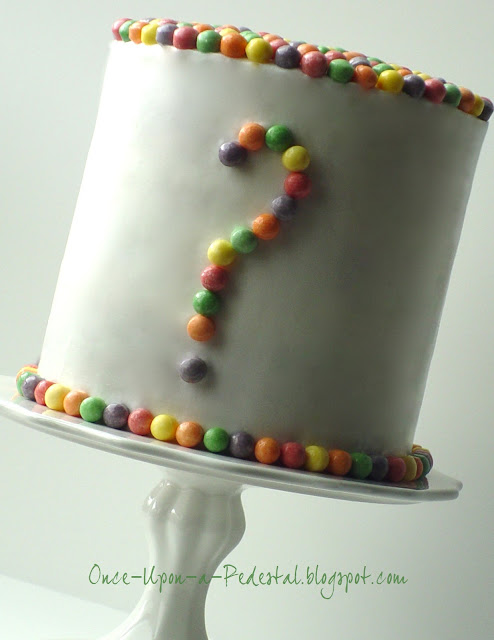
The question mark seemed like a perfect accent to this cake since I still had no clue if this would work.
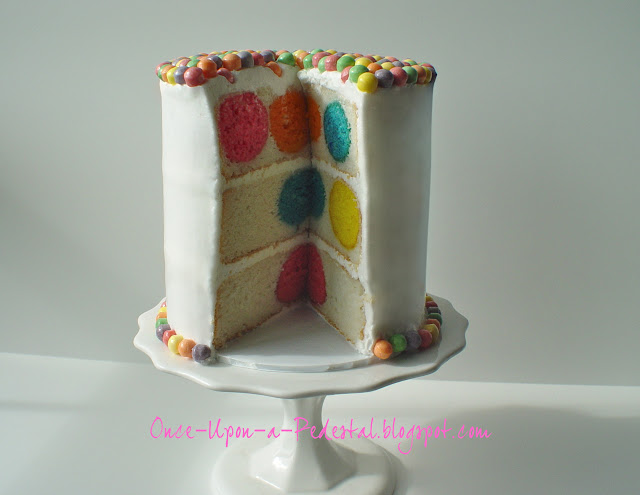
And then the giant cut to remove all doubt . . .
It actually worked!!! Hooray!
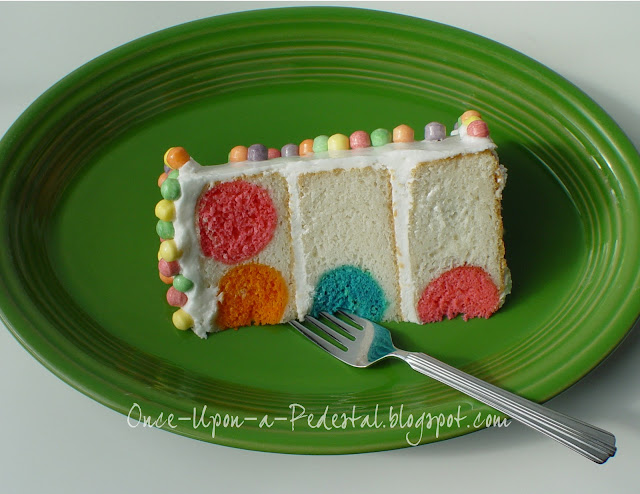
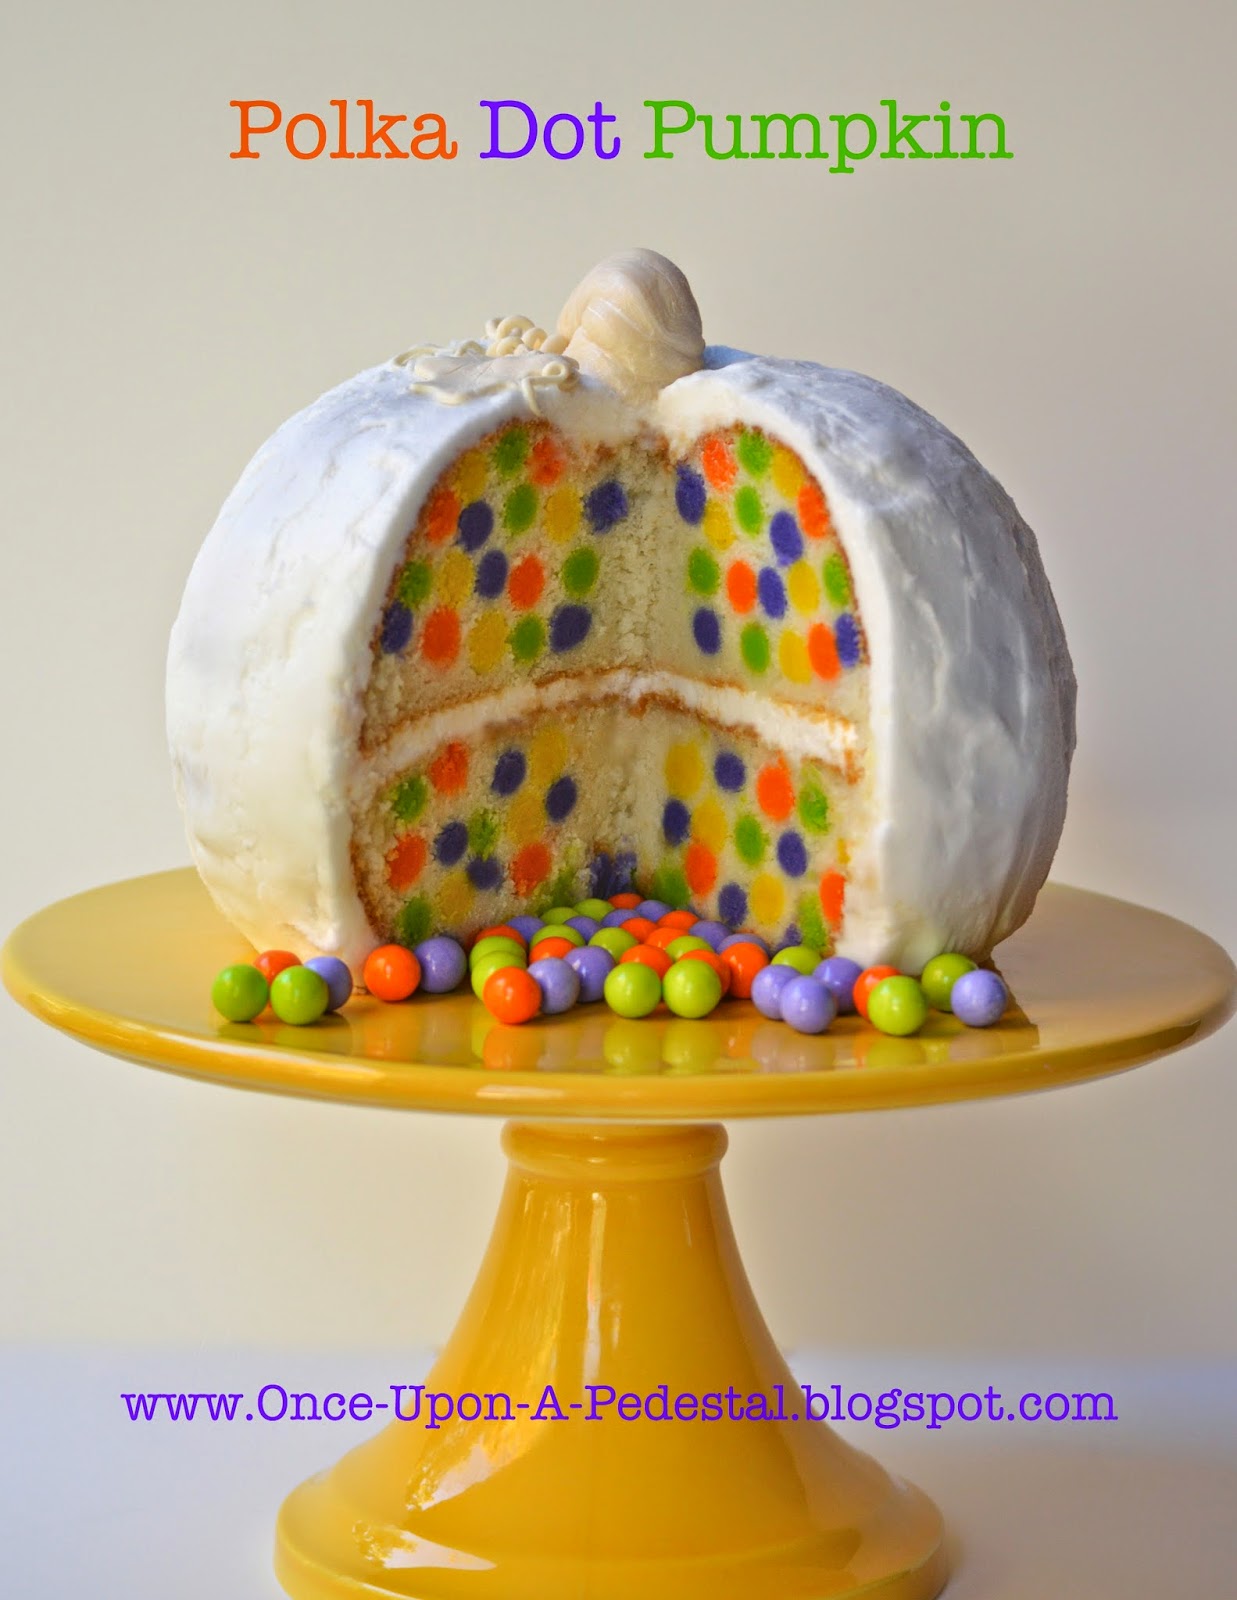
The first slice left this design. Not all dots showing but they're in there somewhere.
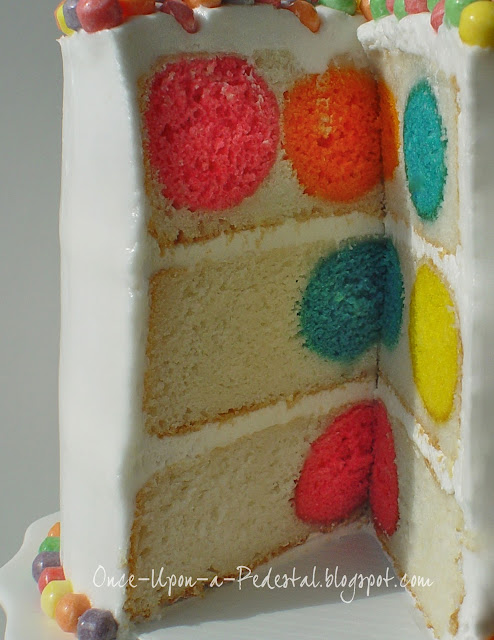
After cutting the second large piece, all but one color magically appeared. Perhaps placing one more ball in the pan would've produced a more even pattern. Next time.
Here's another great surprise about these types of cakes: the colored balls stayed as moist as the rest of the cake even though they were completely baked before hand!!! You'll want to try it yourself just to see but as long as you don't overcook the balls in the first bake, your cake will be moist all the way through. Gotta love science!
You can find a shorter version of the tutorial with the recipes HERE.
Mine is not the first attempt to hide patterns inside cakes. Hidden checkerboard designs have been around for centuries. The very first Battenburg or checkerboard cake was said to have been made in 1884 to celebrate the marriage Queen Victoria's granddaughter, Princess Victoria to Prince Louis of Battenburg.
I can't wait to try more shapes and patterns! The next experiments will be to try smaller balls of different sizes for more of a confetti look. And squares. And . . .
I'll keep ya posted!
Note: This cake design is copyright protected so if you plan to use it for your own tutorial, video or other purpose, you must link back to this blog and give proper credit. No commercial use is allowed.
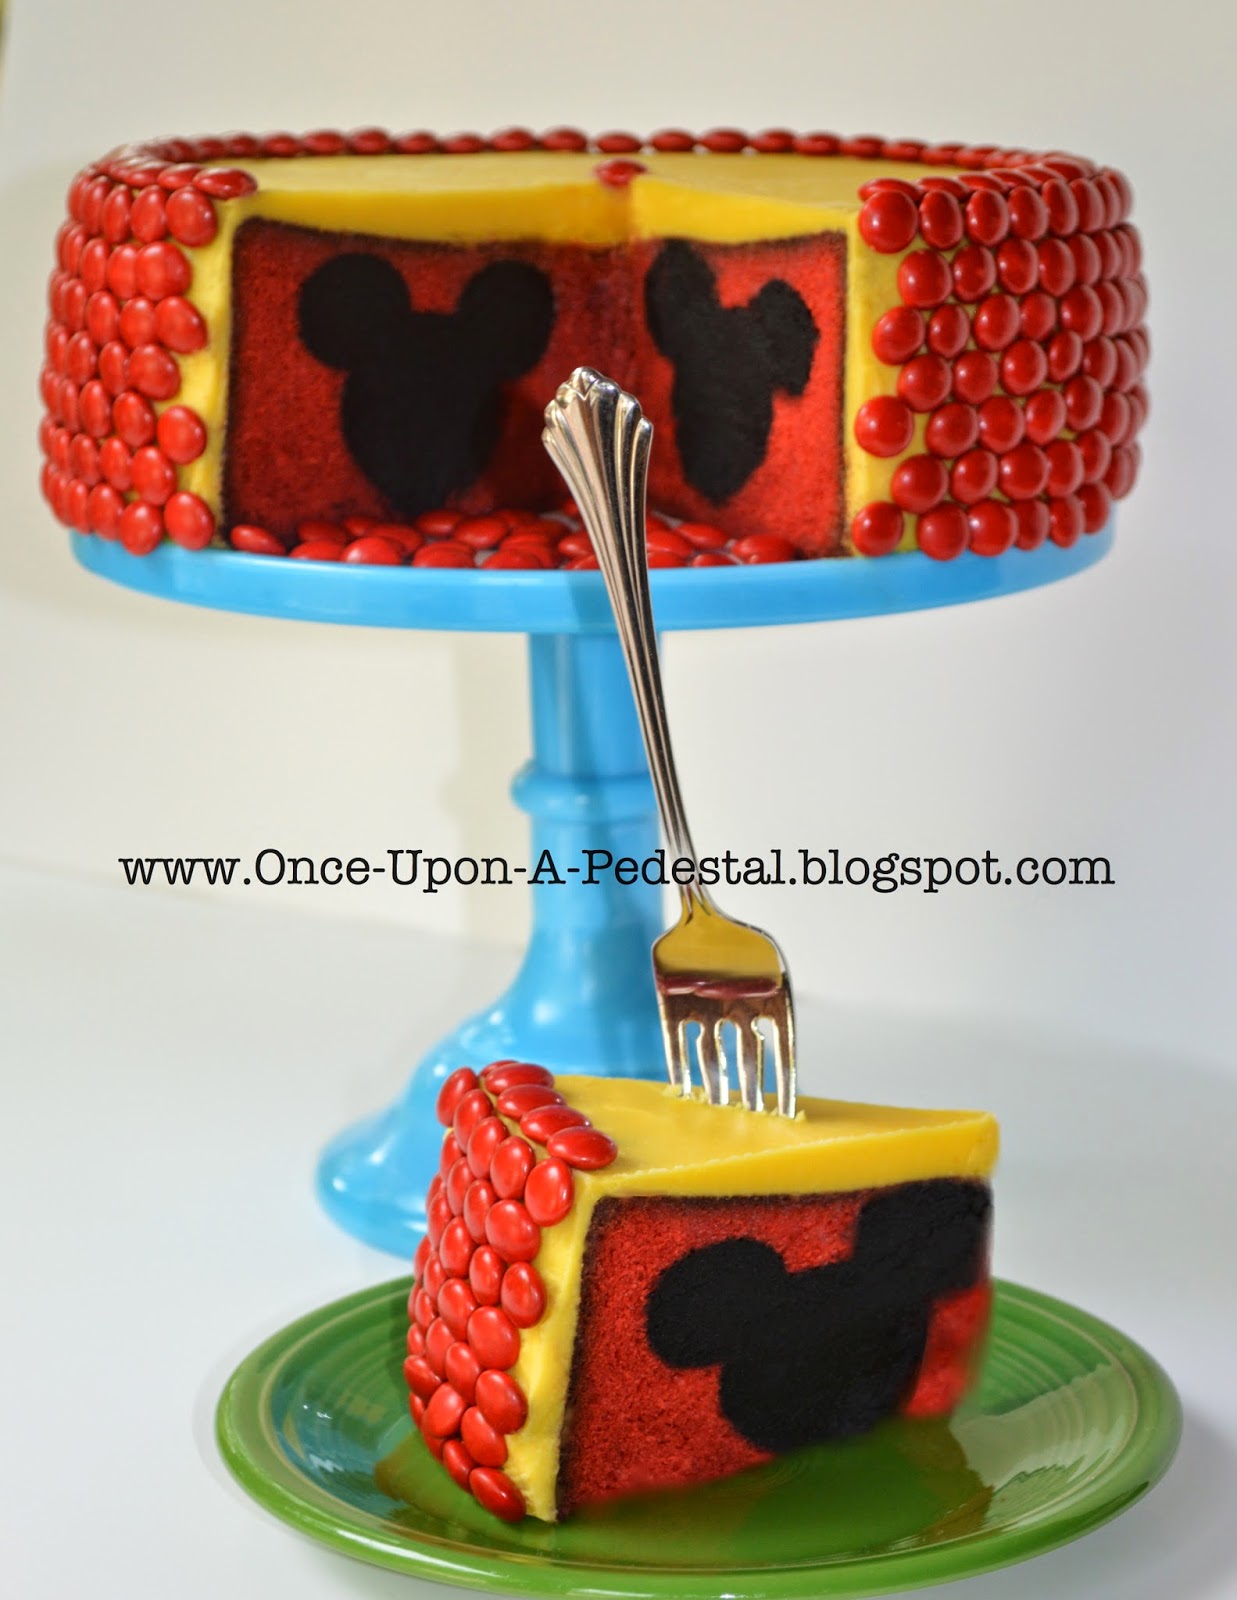
Want to see more of my hidden or twice baked cakes?
More Hidden Polka Dots or what happens with cone shapes . . .
Twice Baked Cake or More Hidden Polka Dots or what happens with a mini donut pan and a straw . . .
Squares or my attempt at stained glass for a cathedral window look.
Thanks for stopping by!
Sweet regards,
Deborah










285 comments:
«Oldest ‹Older 201 – 285 of 285You know what? I'm a little french blogger and I want to do a polka dot party. Your tutorial will really help me. Thank you so much!
Nancy,
So happy to hear that you are trying the cake! Don't be scared. You can do it.
Freezing the layers before icing really helps with crumbs. Once you try it, you won't do it any other way again. Frozen layers are just so much easier to handle. And if you wrap the cake well while freezing, it will be as moist when you cut into it as if it were fresh baked.
I use a serrated knife to cut and wipe the knife clean between each cut.
Try a small one layer in advance if you have time so you can see how easy it is. Hope you'll share some of the many photos when you're finished.
Happy Caking!
Deborah
Cecilia,
A polka dot party sounds like so much fun! Hope you'll share some pics of the merriment.
Happy Caking!
Hi, I found a similar cake out there (yours is way better IMO) but I had a question. I'm doing a ladybug theme and I'm planning on doing red polka dots. This other cake has your polka dots but somehow has smaller black polka dots within the bigger polka dots. Do you have any idea how this is possible? Please help me as I am a clueless new mom trying to plan a first birthday party (oh yeah, and trying to do it all myself.) I can send you a picture of the cake or you can look up my pinterest where I've pinned it.
Please please help. Thanks so much!
Sure would be nice if this link really worked. It would have been much easier to print out to follow for those of us that don't have a tablet for kitchen use.
* * * * * * * * * * * * * *
NEW UPDATE:
You can find a shorter version of the tutorial with the recipes
HERE.
* * * * * * * * * * * * * *
Christine,
So sorry that the link was broken. It is now fixed. Thanks for letting me know.
Deborah
Jennifer,
You can try using mini chocolate chips in the batter. Be sure to coat them with flour before adding them in so they won't all sink.
Happy Caking!
Beautiful! Well done!
Thanks hopkalop! Not sure how a search for angel food pans with tin legs would lead you here but I'm so glad it did! Enjoy every minute in London!
Just made your cake idea, can't wait to cut it open. I ran out of box cake mix so I made some from scratch. The scratch mix was more thinner than the box and the balls rose up. But that was the 4 th layer and it was the bottom layer so it should come together nicely. I also gently pushed them back down when I noticed and that helped a lot. Super excited about making this cake design. Thank you. Also just FYI I didn't have a cake pop pan so I made cupcakes. The cup cakes worked out perfectly since I used tall sided baking dishes. I just kept an eye on each one until they were fully cooked. Keep up the awesome ideas!
Thanks for sharing Lisaleegh. Hope it was delish!
Your cakes are wonderful and and looking very different from one another,it will easily attract all the people.
Cakes Delivery In Delhi
This is such I cute cake. I have two grandsons and even though your cake is a little too girly for the boys I thought I would try something for their birthdays so I I decided to make a boys' polka dot cake using black and gold to go with the Batman themed birthday party. It turned out great but i would suggest letting the cake pops cool a little longer before trying to remove them and also I found that using shortening and flour worked better then pan spray and flour.
Thanks for the tips!
Nice informative post ...
Good morning.
Since early September I began to take a tour of all network blogs that suggests me something. It's my personal way to show all I like. I have linked your blog in my latest publication. Everything is properly referenced. Congratulations for your work. Thank you very much.
Can you make a cake ball (bake the cake then make a ball using frosting) then bake that into the white cake? I don't have a cake ball pan.
Thanks and you have excellent ideas!
Yes. You can make this cake with cake balls rather than using the pan. Happy Caking!
I am not sure how in the world my circles keep popping up every time i bake this cake....I have poured the batter on top of each ball and still the same thing happens i am about done with making this cake again!!!....don't know what else to try!!!!!!!!!!
Absolutely love this cake. I am having a polka dot themed tea party for my 2 year old and I can't get this cake out of my mind. I SOOO want to be easy and just make strawberry cupcakes and decorate them with M&M's... but what's the fun in that!
Thanks for the idea!
hi! some days are good, others are not so much. Today was one of them... I woke up tired and overwhelmed.
I saw your colour dot cake long time ago, it was rounding my head! Tomorrow is mi son, 2nd BD... and i´m preparing the cake... but i put just chocolate cake in the dots.
I hope this work. but I´m so happy... Thank you so much!... from chile
I would love to have a link to your blog on my blog as I think this site is amazing a offers alot. - here is a link, let me know if that would be ok.
http://rosespantry.blogspot.co.nz/p/childrens-parties-easy-no-bake.html
I was just wondering if you could tell me the suggestions the cake pop pan told you to do when using a cake batter? I didn't buy that kit I just have a pan and so I don't know how to use regular cake mix in it. Thanks
Mel O,
Here is a link to Bake Pop instructions and the ingredients. I did not decrease the liquid as they suggested or increase the eggs but instead used the amounts listed on the cake mix box.
http://www.youtube.com/watch?v=qaL2AmINiV4
Bake Pops also has a Facebook page where lots of people have posted their questions and tips so you may want to look there as well.
http://www.facebook.com/BakePops
Hope this helps!
Really appreciate you sharing this blog. Awesome.
Free Online Coupon Codes
Love this and can't wait to test it out for myself!!
Have you thought about flavoring the colors? So even if you close your eyes the cake has some color to it.
Thank you for this idea. I'm gonna bake my daughter's baby shower cake and I like this idea but I'm gonna experiment first so I can perfect it for that day. Don't want to make it for the first time for the shower and it turning out bad.
Taylor,
The balls and/or cake can be flavored any way you choose. Yet another way to mix it up a bit!
Happy Caking!
Lucy,
Can't wait to see how yours turns out!
I was so excited to see this cake , because I have one of the cake pops pan...So I decided to give it a go.The trouble I had was that my balls were brownish on the outside so you could not see what colour they were till I cut them in half. Please how can I solve
this problem.
I made the polka dot cake last week and my family was very impressed. I did white "dots" in chocolate cake. I did not want to do the colored "dots" which would have been a lot more work.
I wanted to be sure I could do it first and see how it turned out, so the white 'dots" in chocolate was the best way to start.
I baked the white cake in 8" cake pan and filled it only 1/4" full, using 2 8" pans. Use the other batter for cupcakes.
I used a cutter for cupcakes so they could be filled, the circles were perfect to use on the 8" cakes. Froze the "dots" so they would be easier to cut. Put 7 in the 8" pan and 3 in the center of the pan. Made the chocolate cake batter using chocolate instant pudding. The cake was very thick and I had to spoon it between the "dots" and on top of them so every bit of white was covered. Turned out beautifully.
Carmel,
Decrease the baking time and/or oven temp next time. That should solve the problem.
Thanks for stopping by!
Deborah
Donna,
Thanks so much for giving the tutorial a try. So happy that it turned out well for you!
Happy Caking!
Deborah
I made a cake of my own, I don't know how I can post it here though
Hi Kay,
You can post your photos at:
https://www.facebook.com/pages/Polka-Dot-or-Twice-Baked-Cakes-with-Hidden-Surprises/432394123469145
See "Recent Posts by Others" for other Surprise Inside Bakers.
Happy Caking!
Hi I absolutely love your cake and plan on making it for my daughter's second birthday. I'm thinking a polka dot theme.
I saw your post about the candy on top. I know you said "chewy skittles" but they really don't look like skittles to me.
Are you sure you used skittles? Otherwise, are there any other candy suggestions that you have?
Thank you!!!
Jaclyn,
They really are chewy skittles but are the tropical flavors. I turned them all around so the "S" wouldn't show. M&M's and Sixlets are other great alternates. Be sure to wait as long as possible to put the candy on so it won't bleed or get mushy if refrigerated. Crusting buttercreams, fondant or modeling chocolate would also help with this issue.
Hope this helps.
Deborah
Are those 6" pans that are 2" high?
R Williams:
Yes, the 6" pans are 2" tall.
Thanks for stopping by!
Deborah
I would just like to know if you mixed the pudding in with the cake mix for the balls after all the ingredients for the cake mix was put together?
Hi Melissa,
Sorry that the instructions aren't clear. The dry pudding mix should be added to the dry cake mix. The other ingredients listed on the pudding mix should be ignored.
Hope this helps.
Deborah
Thank you for sharing! My birthday is tomorrow and I was trying to think of something fun and this is perfect!
Hello, thanks for answering my last question. I just have one more.
Where you have placed the instructions, you mention putting 1 cup sour cream, 3 egg whites, 1/2 cup milk and 1/3 vegetable oil. Is this in addition to the cake batter ingredients from the box?
Happy Birthday Tenielle!
Melissa,
The ingredients are instead of those listed on the package. Sorry for the confusion.
What are the little balls that you used to decorate the finished cake? Is it gumballs? The cake is so cute. I'm in love with this idea.
What a fantastic idea! Thanks for sharing it here
I love your page, and LOVE this cake!! From the moment my friend showed it to me, I knew I wanted to make it for my daughter's first birthday party- the theme of which is polka dots and elephants. I did a trial run in regular ole 8" pans and it worked great. Unfortunately it was lumpy because the cake balls were taller than the pan, but i figured that could be fixed by using a springform pan. So I put the thin layer of batter in the bottom, added cake balls (made as you instructed) and they rose like brightly colored balloons. Sadness. Perhaps due to, as one previous post suggested, difference in density of batter- but the cake batter was lighter than the ball batter so that makes no sense. I'm going to try to remedy this by freezing the thin layer of batter with the cake balls....then covering with batter. but i'm kind of frustrated. i have pretty high expectations of myself. suggestions welcome!! the event is Saturday!
I am from Australia and I am just wondering what the egg white method is, and can I use any moist vanilla cake mix, as we do not have the brand of cake pictured here in Australia. Thank you.
I bought mine at walmart $19.99 and I love it ! I use mine on holidays I bake the cake balls fill them with whip topping and dip them in chocolate everyone loves them huge hit around my home grandkids love them . I have also filled them with pudding any flavor u like I, just mix mix pudding like box says use instant pudding its easier to fill balls with and I use my icing bags to put pudding in or whip topping but dont over fill or will be difficult to cover with melted chocolate. These taste like Minnie Hostice cupcakes enjoy!!!!
I love this cake. You've certainly hit the mark with this one look at all of the comments you have received.
If you read this whole page she tells us where she bought the cake pop pan. Yes they have an online store.
This is top class baking! The dots would be such a treat to discover!
Thank you so Much they were DELICIOUS and you Tutorial made it so so easy!!!
Highly recommended SEO Austin Don Allen click here
Awesome recipe, excellent quality photos.
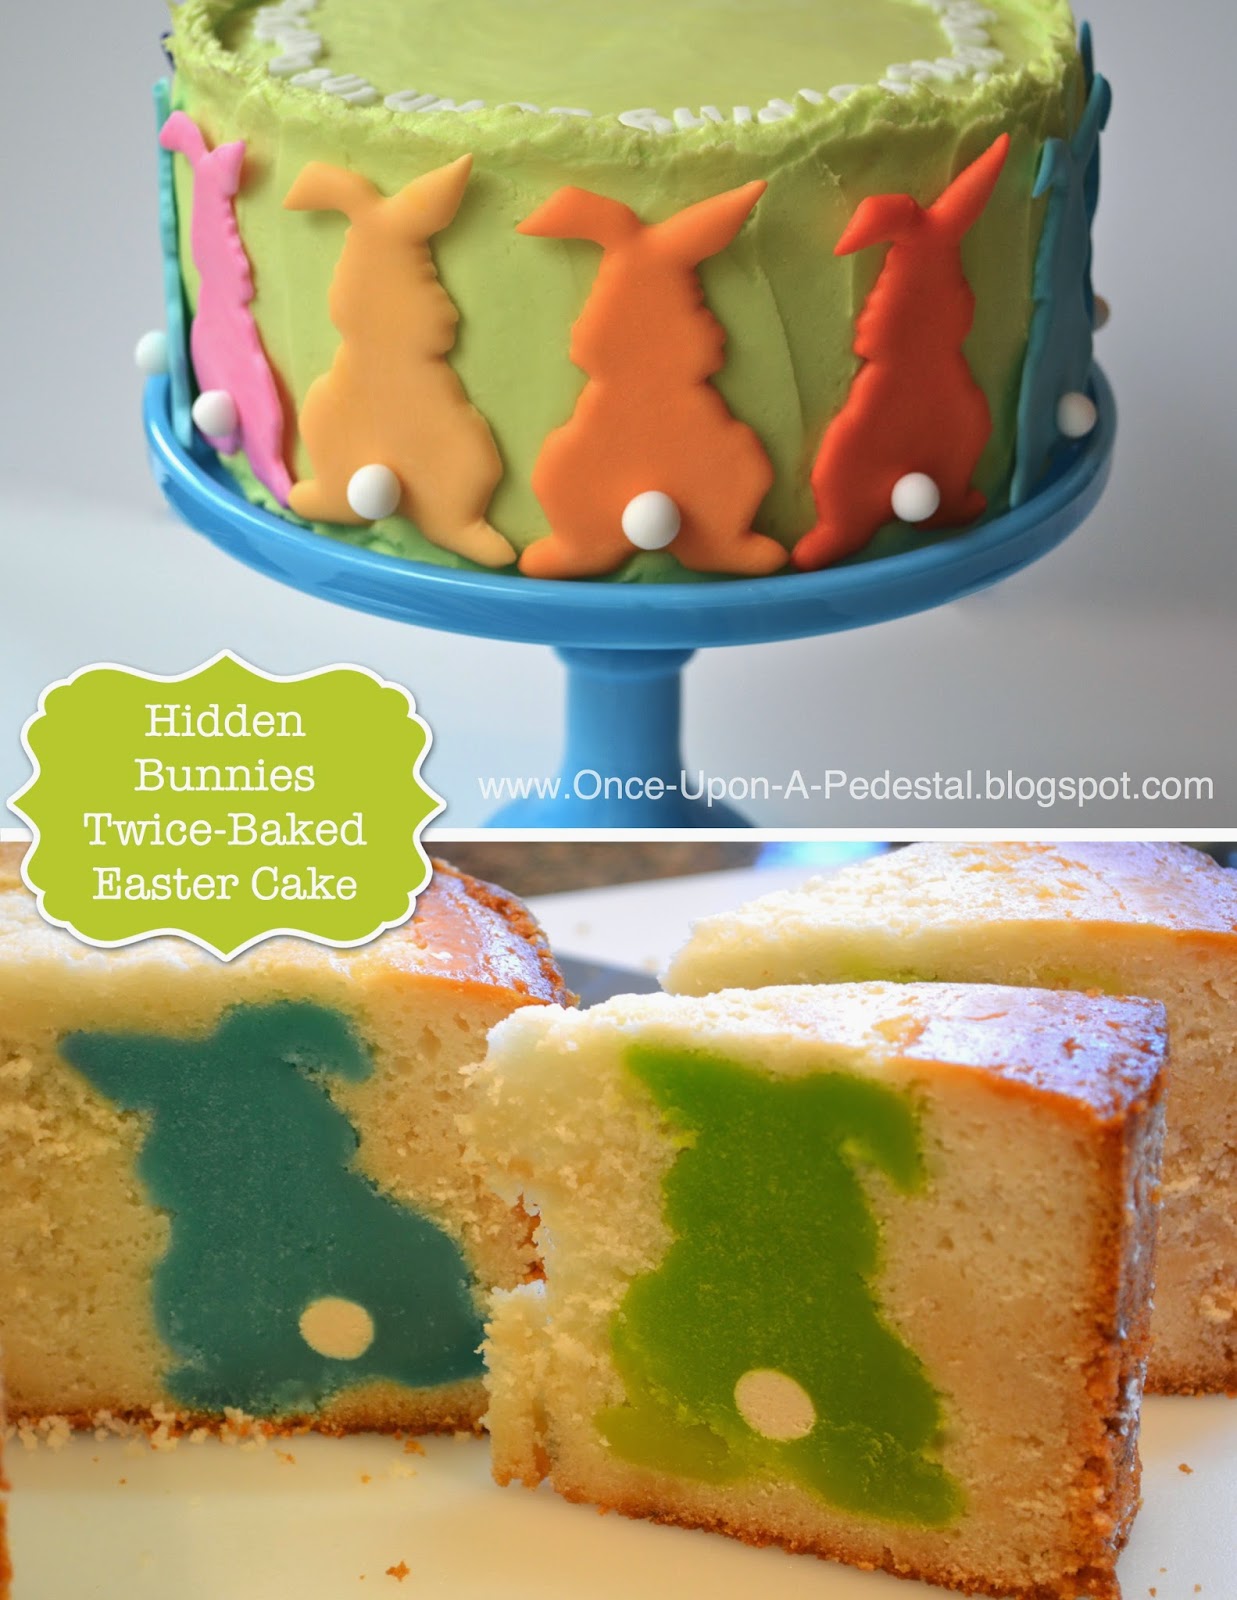
Love this wonderful cake! I would like to give it a try using Easter egg shaped balls- do you think that would work? It is ok if the "tip over", might look more whimsical ;)
But- my dilemma is that I need to cook without eggs, wheat flour or dairy due to food allergies. I usually use cherrybrook kitchen yellow cake mix, which is very expensive for a boxed mix, but still cheaper than buying all of the ingredients needed for an allergen-free cake. Would love to hear your thoughts on whether this would work with my mix? It behaves like most gluten-free cakes if that helps....thanks so much and thank you also for sharing this very clever idea!!! Always looking for ways to make food more fun around here ;)
It should work fine with egg shapes and an allergen-free mix. Would love to see photos when you're done.
Happy caking!
This look fairly straight forward on Pinterst....says this NON-BAKER ! :)
But I started out (the night before my daughters birthday) with gusto!!
Hit the brick baking-wall immediately... My balls stick no matter what I try. Spray oil, spray oil w/flour, crisco, crisco with oil...at least I have a pattern here...
So frustrated at 11:00pm that I'm standing outside, writing this and reading everything I can about CAKE BALLS!
Grrr...wish me luck, I'm headed back in to try another batch!! (under cooking them this time)
Just put 4 pans in the oven and I'm so nervous!!!
You don't need a cake ball pan to make this awesome cake. I used mini cupcakes and laid them on their side and the cake came out perfectly. I actually prefer the mini cupcakes as they are bigger than cake balls. I brought the cake to a restaurant for my granddaughters birthday and people were asking where they could buy the cake!
These pops are so colourful, they look like the most fun! And that cake is amazing!
What a wonderful surprise, and this must have taken so much craft and ingenuity!
I've made this before when I first saw your post. I used my cake pop maker instead of a cake pop pan it worked wonderfully. I was looking for a recipie and saw this post again and just thought I'd say I think I'm going to use this for some baby shower cakes I have coming up and the polka dots inside will say what the gender is like pink cake pops for the girl baby shower and blue ones for the boy babyshower.
Meggan - So happy that you had success and are now a semi-professional surprise inside polka dot cake baker! Keep up the great work.
Deborah
Hi!
I'm not sure if somebody else mentioned it but can this be baked with larger 9 inch round pans?
Thanks!
Kathy
I love surprises and surprise in a cake sounds interesting and yummy. cakes are looking so delicious and mouth watering in pictures. Thanks for sharing the beautiful pictures with us.
Thank you for this wonderful recipe. It was a great hit.
I was wondering how it could be changed to make it a chocolate cake?
If I just use a chocolate cake mix and chocolate instant pudding, while following the other instructions would it work?
Thanks
Switching the cake to chocolate is as easy as you suggest. The colors really pop in a dark background. Thanks for giving it a try!
Wow, i do not how I found this old post but I am so glad. My daugther first birthday is coming up and this cake will be a perfect idea for my wife to try.
She loves to do cake and still learning.
Will forward to wife =)
Thank you so much for this amazing cake. It turned out so well. I got so many compliments. Instead of cake pops inside I baked it into a sheet cake and cut lots of 40's out of it. Then baked them into the main cake. It turned out great. Thank you.
So happy that it turned out well for you Jess!
Thank you for sharing I can't wait to try this in a cake it's my nephew's birthday this month and my nieces April just got to decide on a design for the out side now . Will link back when IV done it thank you
I love this cake, so fun! Ive made it once. Everyone loved it!
So happy that you guys are still enjoying this fun classic! Keep on baking!
Bakery products require special types of packaging, such as cake boxes, for protection during transport. Custom Printed Cake Boxes
Nice Post, Are you looking to buy Buy Cake Maker Machine Online in Dubai , Buy at low price in Dubai on Saachi Store with high quality Automatic Temperature Control. Shop online for Electric Cake Maker with low price in saachi stores.
The article you have shared here very awesome. I really like and appreciated your work. I read deeply your article, the points you have mentioned in this article are useful. Looking for automation software then read this article about 9 Best Auto Clicker Software
Best Guest blogger
Non Stick trays are awesome and the recipe is great.
yours cake looks very very delicious.
nice cake blog
Post a Comment